
As promised in my Blue to Red Gradient post a few weeks ago, here is a tutorial on how to do gradient nails.

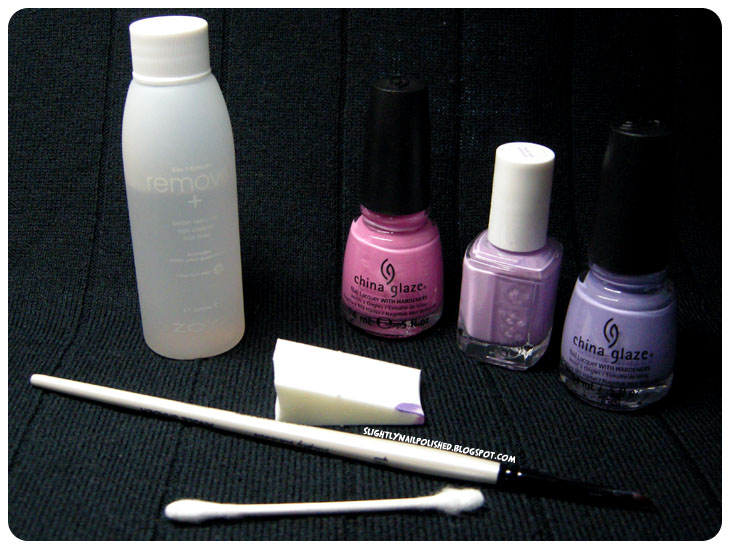
- 2-5 Nail polishes. Unless you have long nails, I wouldn't use more than 3 polishes. And you can choose whatever colors you'd like! I decided to go with a gradient from Pink to purple, so I have China Glaze Dance Baby and Tart-y For The Party as well as Essie Bond With Whomever.
- A Sponge. I prefer to use a makeup sponge/wedge, but you can use any type of sponge you like just as long as it can absorb and hold the color.
- Acetone, Cleanup/Angled Brush and Q-tips. Or at least something to clean up your cuticle because you're gonna make a mess!
- Optional: Tape. If you wish to have less of a mess on your fingers, I suggest you use tape to protect them. Wrap the tape around your nail, following the edge and your cuticle.
Step 1:


After applying a basecoat, paint your nails with your lightest color. Mine happens to be Essie Bond With Whomever. You can also use white for this step, but I find that you have to work a little harder to cover it in the following steps, especially near the corners and creases near your skin. Let polish completely dry before moving on.

Grab your sponge and polishes! In the order you want them to fade, place a stripe of paint on the sponge, as pictures above. Have each stripe overlap eachother to help with the fade.
Step 3:

Tap the sponge on the nail, making sure to get all the colors on your nail. Let completely dry before the next step because you don't want to pull up the polish you've already placed.
Step 4:

Repeat step 3. Only this time, try to blend the colors together. As you tap the sponge against your nail, move the sponge slightly up (towards cuticle) and down (towards tip) on the nail. This will help the gradient look more seamless.
Step 5:

Clean up those fingertips! I used a q-tip and 100% acetone to clean up the majority of my finger then went in with an angled brush around the cuticle. You can use a polish remover pen for this step if you happen to have one.
Step 6:

Topcoat! Seche Vite is my topcoat of choice. This step will help blend all the colors together to make the gradient even smoother!

And you're done! Easy as pie. And just in case you're wondering, the colors I used for the blue to green gradient are Bahamian Escape, For Audrey, and Gaga For Green, all 3 by China Glaze.
I really hope this helpful and that you enjoy!
~Samantha Rae
-----
Pink-Purple:
Dance Baby by China Glaze
Bond With Whomever By Essie
Tart-y For the Party by China Glaze
Blue-Green:
Bahamian Escape by China Glaze
For Audrey by China Glaze
Gaga For Green by China Glaze
*Polishes and supplies purchased by me. The opinions above are my own and should be taken as such.
I am not a professional.*
I am not a professional.*
No comments:
Post a Comment